MICROSOFT AZURE (2): CONNECTING A SIMULATED DEVICE TO AN IoT HUB USING NODE.JS

* This exercise is based on the previous one
1 - Creating a device identity
- CreateDeviceIdentity.js creates a device identity and associated security key to connect a simulated device app.
- Running this console app generates a unique device ID and key that the device can use to identify itself when it sends device-to-cloud messages to IoT Hub.
- New folder:

- Checking that node and npm are correctly installed:

- npm creates a json package, just accepting the default options:

- Installing the azure-iothub service SDK package:

- Writing the CreateDeviceIdentity.js file:

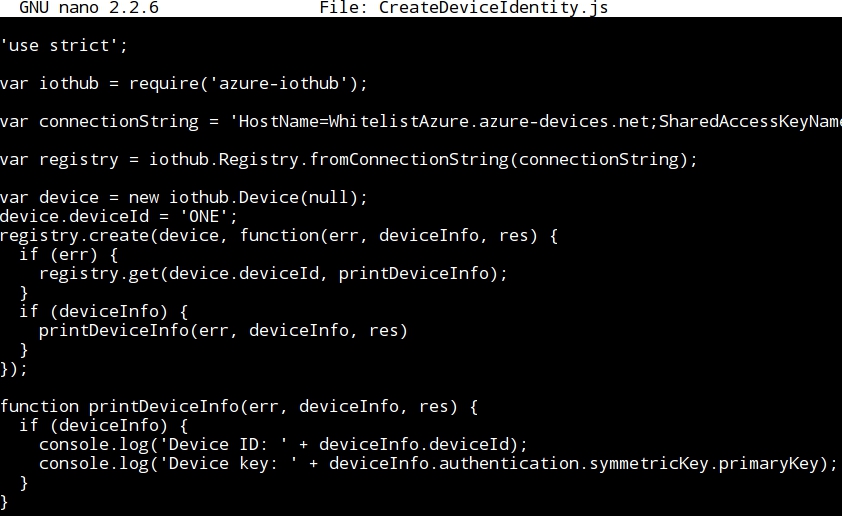
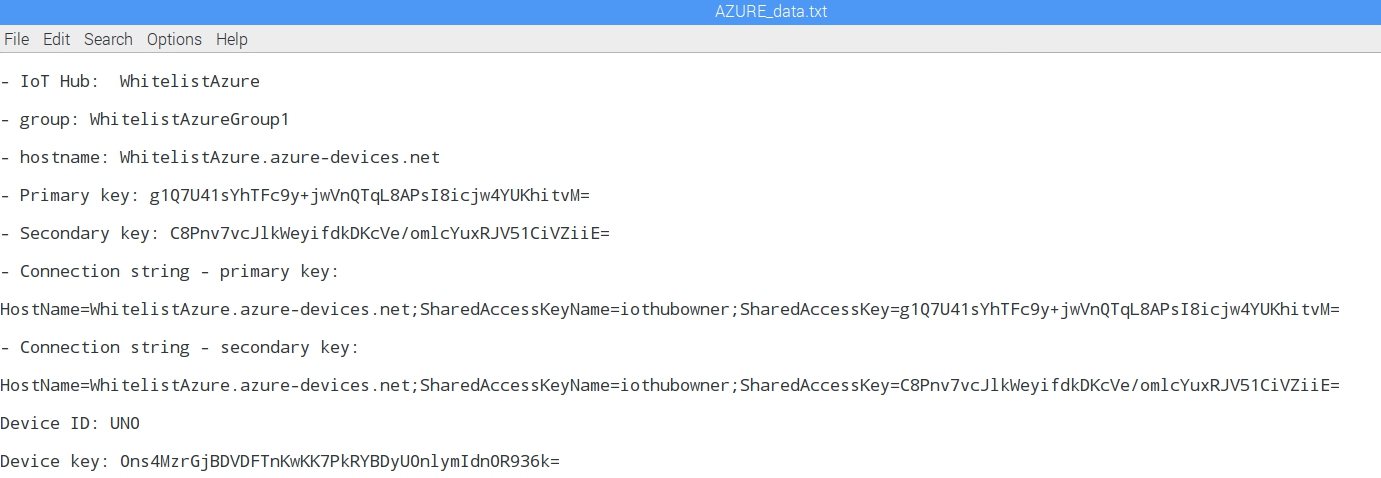
- It is important to notice that the variable connection string holds the "connection string - primary key" obtained in the previous exercise:


- Also, the deviceID must be entered:

- Running the program, a new Device key is generated:

- The Device key is written down or copied and added to the document with all the parameters and keys:
2 - Receive device to cloud messages
- ReadDeviceToCloudMessages.js displays the telemetry sent by the simulated device app, reading device-to-cloud messages from IoT Hub using the AMQP protocol.
- New folder:

- Creating a new json package file and accepting all the default options:

- Installing azure-event-hubs package and saving it:

- Writing the program ReadDeviceToCloudMessages.js:

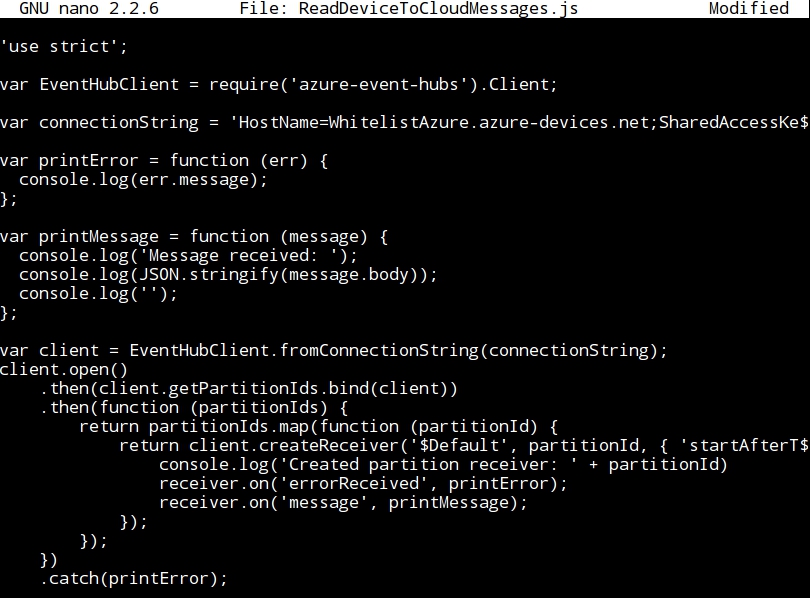
- As before, it is important to notice that the connection string key must be introduced in the variable connectionString.
3 - Simulated Device
- SimulatedDevice.js connects the IoT hub with the device identity created earlier, and sends a telemetry message every second using the MQTT protocol.
- New folder:

- json package:

- Installing azure-iot-device and azure-iot-device-mqtt:

- Writing the program, and using the connectionString variable with the Device key value originated at the section Create a device identity (point 1 of this exercise):

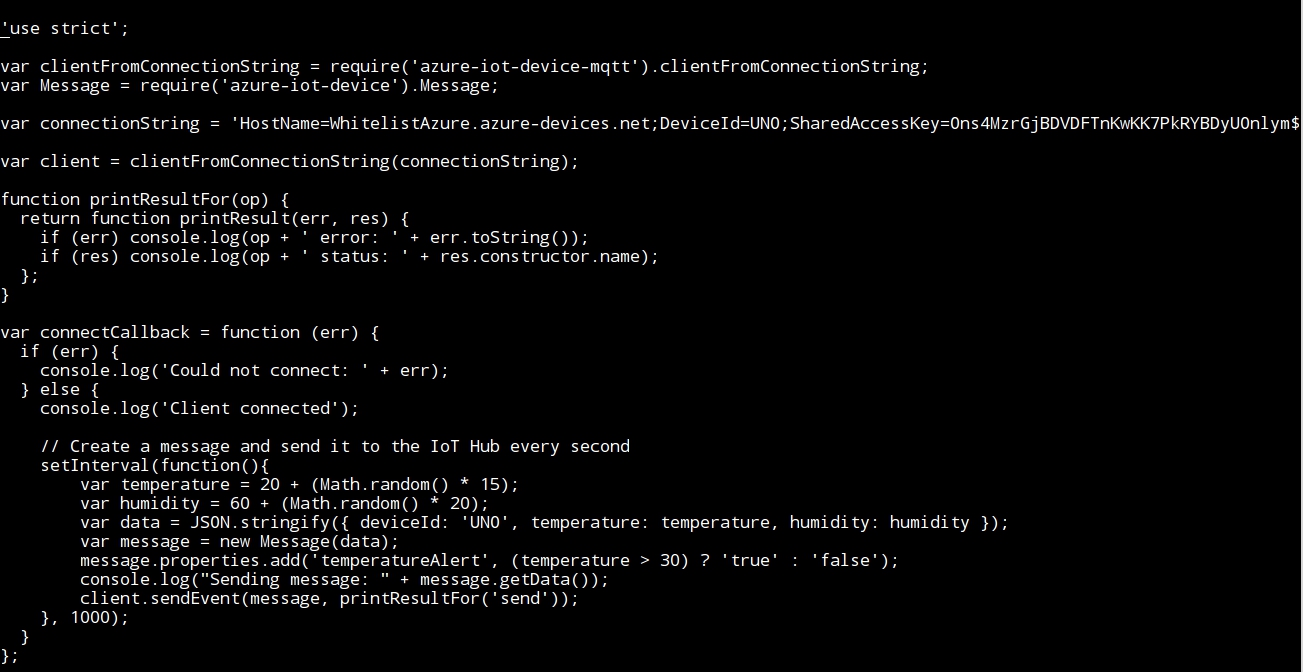
- All of these parameters must be carefully entered:


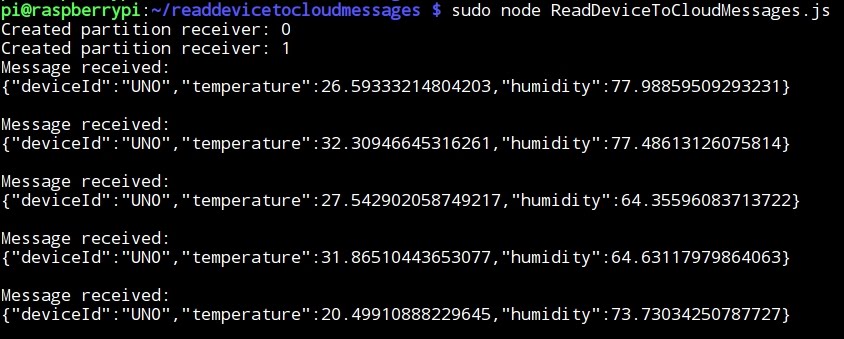
4 - Running the application
- To run the two applications a separate console must be used, so that the communication between the simulated device and the IoT hub can be displayed.
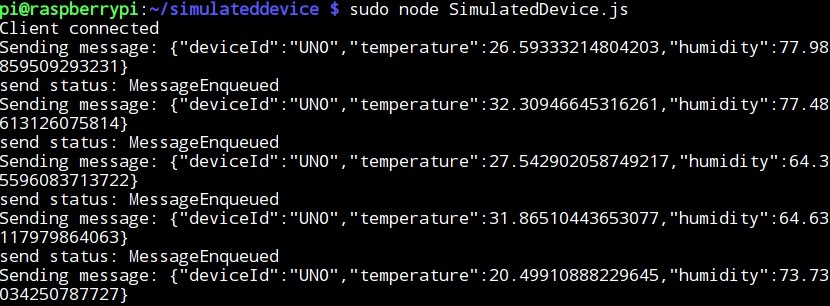
- Running SimulatedDevice.js to send telemetry data to the IoT hub:
- Running ReadDeviceToCloudMessages.js to monitor the IoT hub: